2012年04月05日
DIY: BlackHawk M16A3
私たちのブログを訪問していただきありがとうございます。あなたがお持ちの場合DIYの要求は私達に電子メールを送信してください。

Black Hawk Down fans out there. Here is a simple DIY guide on how to convert your Tokyo Marui Sopmod/CQB-R to M16A3
Note: During the conversion you will need some tools and basic machining skills, if you don't have a lathe and milling machine a dremmel tool and alike will also do the job.
Base gun-Tokyo Marui Next Generation M4A1 CQB-R.

Step 1: Remove the butt stock, remove buffer tube out from the frame.
*It looks like this when all the small bits,wire and tube cap are removed.

Step 2: Remove this part. (see image to follow)
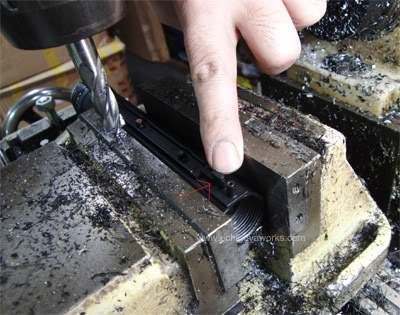
*It looks like this after machining.

Step 3: Reduce buffer tube thread from 19mm+- to 12mm+-

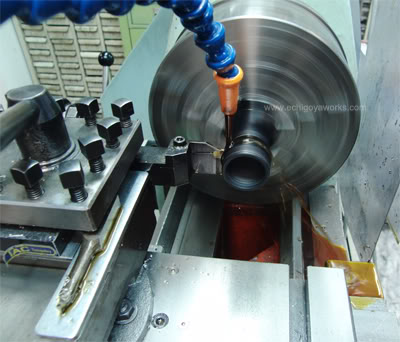
*It should look like this after machining.

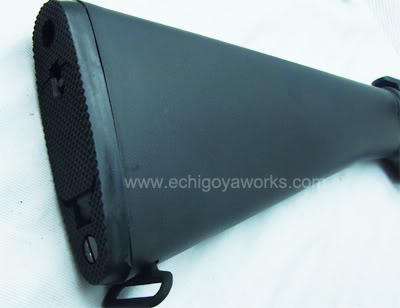
Step 4: Grab any AEG m16 fixed butt stock and remove all the screw and butt plate
Step 5: Use A chisel to remove this tube pipe stopper (see image to follow)


*Stopper is removed out from the shell

Step 6: Use a dremel to remove these parts ( with red marks)
*It looks like this after removing.

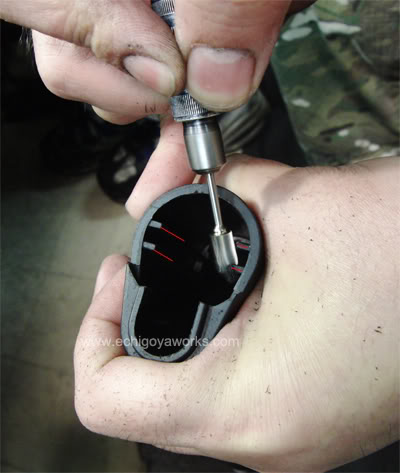
Step 7: Insert the buffer tube to the stock, use a dremel to make a 3.30mm gap/space this is where the steel ring going to sit in. (see image to follow, do it carefully)

Step 8: Remove these two sides. Do not remove the center part this will lock on the lower frame. It should be snug fit to the lower frame. do it carefuly (see image to follow)

*It looks like this after removing the two sides.

Step 9: Cut this steel plate, use a milling machine or metal grinder (see image to follow)

*it should look like this after

* This time you will need to replace the Tokyo Marui tube cap to ARS
CNC hard metal tube cap.This tube cap has a 5mm thread and you need a 5mm x 100mm long lock screw.

Step 10: Reinstall the buffer tube,steel ring , recoil unit, recoil spring, ARS tube cap,wire, mosfet, butt plate and lastly lock it with the long screw.

*It looks like this after


Step 11: For m16 front assembly, change the TM stock 10.5 inches outer barrel to Echigoya CNC one piece hard Steel 20 inches outer barrel


Put everything back and you're Done!!! M16A3 Black Hawk Down look alike!

BLOG ARCHIVES


Dura Coat Finishes
P90 Disassembly
MP5K Disassembly
H&K UMP Gearbox ver. 3
M4A1 AEG Disassembly
Gearbox Reassembly
P90 Disassembly
MP5K Disassembly
H&K UMP Gearbox ver. 3
M4A1 AEG Disassembly
Gearbox Reassembly
Posted by echigoyaworks
at 12:21
│DIYs

