2012年03月27日
Magpul Type Ambidextrous Sling Installation
私たちのブログを訪問していただきありがとうございます。あなたがお持ちの場合DIYの要求は私達に電子メールを送信してください。
This is a DIY on how to install The ARS ambidextrous sling attachment to the Tokyo Marui M4 Recoil Shock Series. I wish I had a guide like this when I did mine, because I ended up scratching the buffer tube, and installing it misaligned.

You will need few basic tools to do this
1. Philips screwdriver
2. Soldering iron (this is important if you want to do it properly)
3. Flat head screwdriver or a knife

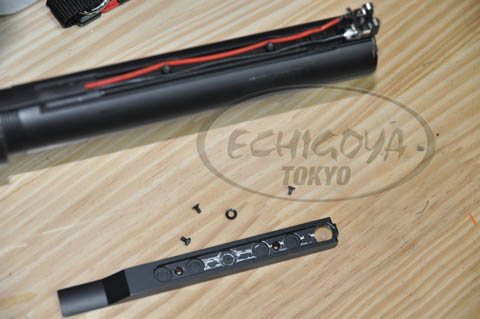
First remove the buttstock by sliding it off the buffer tube. Then remove the three screws as shown.
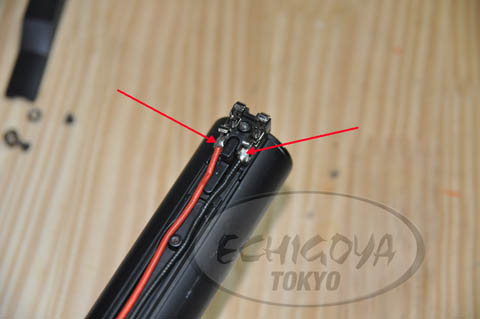
Remove the wire cover and you will see the wires with the connector that contacts with the stock pipe battery plate.
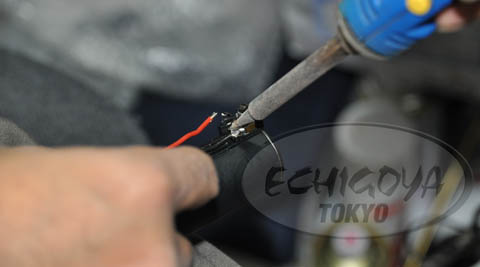
Now using a soldering iron, you have to detach the connector assembly.

Shown here as the wires are disconnected (this is really important to do a good job, otherwise you will have trouble screwing back your buffer tube)

Remove the wire cover here.
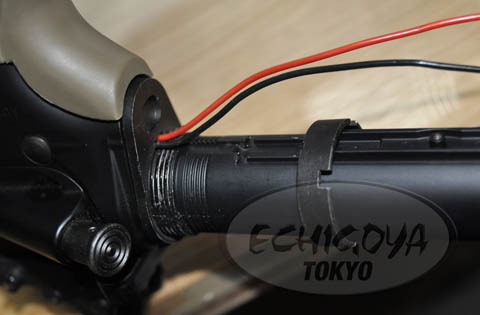
Using a stockpipe wrench loosen the buffer tube ring until you can pull the wires off it.

Then do the same thing with the receiver backplate.

Now you are ready to unscrew the buffer tube.

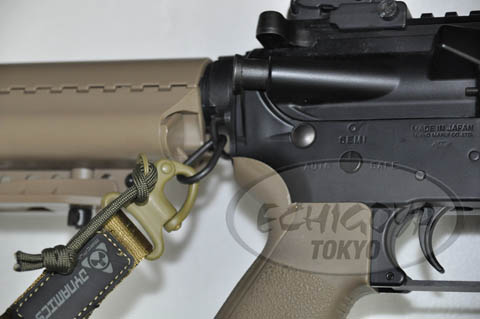
After removing the buffer tube, you are now ready to replace the metal back plate with the ambidextrous sling attachment.

Now reattach the buffer tube slowly making sure that you don’t scratch the finish on the pipe.

Now insert the wires inside the sling attachment and the buffer tube ring.

From here, it’s just a matter of backtracking and putting everything back the way you disassembled you it.
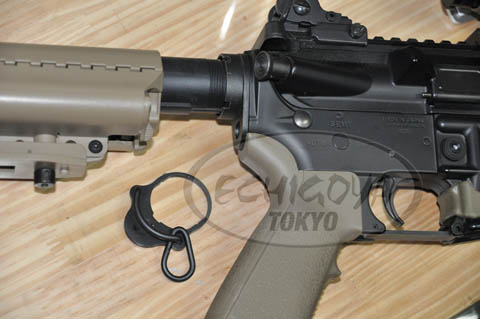
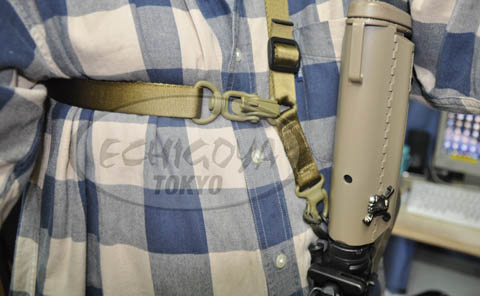
Here’s how it look after attaching the magpul sling.
NEWS ARCHIVES

This is a DIY on how to install The ARS ambidextrous sling attachment to the Tokyo Marui M4 Recoil Shock Series. I wish I had a guide like this when I did mine, because I ended up scratching the buffer tube, and installing it misaligned.

You will need few basic tools to do this
1. Philips screwdriver
2. Soldering iron (this is important if you want to do it properly)
3. Flat head screwdriver or a knife


First remove the buttstock by sliding it off the buffer tube. Then remove the three screws as shown.

Remove the wire cover and you will see the wires with the connector that contacts with the stock pipe battery plate.


Now using a soldering iron, you have to detach the connector assembly.

Shown here as the wires are disconnected (this is really important to do a good job, otherwise you will have trouble screwing back your buffer tube)

Remove the wire cover here.

Using a stockpipe wrench loosen the buffer tube ring until you can pull the wires off it.

Then do the same thing with the receiver backplate.

Now you are ready to unscrew the buffer tube.

After removing the buffer tube, you are now ready to replace the metal back plate with the ambidextrous sling attachment.

Now reattach the buffer tube slowly making sure that you don’t scratch the finish on the pipe.

Now insert the wires inside the sling attachment and the buffer tube ring.

From here, it’s just a matter of backtracking and putting everything back the way you disassembled you it.
Here’s how it look after attaching the magpul sling.


NEWS ARCHIVES


Dura Coat Finishes
P90 Disassembly
MP5K Disassembly
H&K UMP Gearbox ver. 3
M4A1 AEG Disassembly
Gearbox Reassembly
P90 Disassembly
MP5K Disassembly
H&K UMP Gearbox ver. 3
M4A1 AEG Disassembly
Gearbox Reassembly
Posted by echigoyaworks
at 12:20
│DIYs

