2012年05月23日
M4A1 AEG Disassembly
私たちのブログを訪問していただきありがとうございます。あなたがお持ちの場合DIYの要求は私達に電子メールを送信してください。
Following is photographic step-by-step disassembly of a standard M4 AEG. This is not the new recoil shock series.

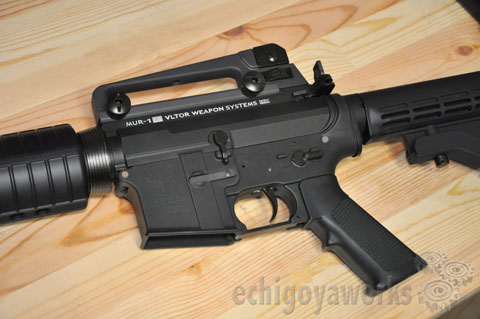
This is a Tokyo Marui M4A1 rifle with upgraded metal body, so the beginning of disassembly is different from the stock plastic receiver.

First remove the lower handguard by pulling the delta ring backwards and pulling the lower handguard downwards.

Then turn over (no need to remove) the fuse assembly and disconnect the two wires connecting to the fusebox.
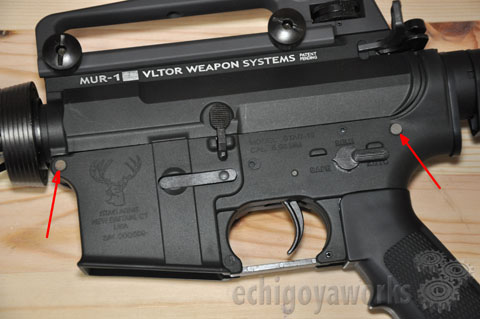
Now remove these two pins that holds the receivers in place. You can use an allen wrench and a small hammer if it's a little tight.
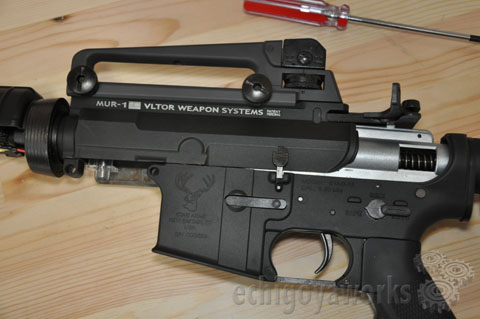
After removing the pins, start sliding the upper receiver forward, but not all the way.

This charging latch will catch on the gearbox as shown. So you need to pull the charging handle and slightly push it upwards to disengage it from the gearbox. Then you can slide the upper receiver all the way out.

Now that we have the upper receiver out, it is time to remove the gearbox. Please do not lose the bolt catch paddle, although the gun will work without it, it still adds a little realism to your gun.

Now remove the butt stock by pulling the stock lever as shown and then slide it outwards.

Now remove this screw (using allen wrench) which holds the buffer tube endcap.

Then using a phillips screwdriver remove the long screw that holds the buffer tube into the lower receiver.

And pull it out as shown.

Now to remove the motor, remove these two screws under the grip.

Once the screws are removed the grip cover will come out. Be careful not to lose the round metal plate. This is needed for the motor tension adjustment for proper meshing of gears.
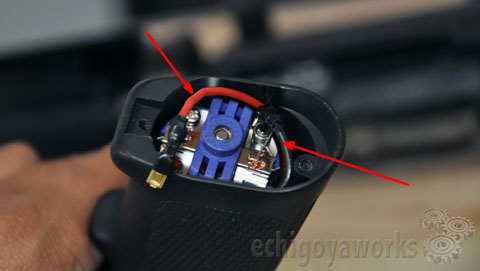
Then disconnect the two wires from the motor (take note of the position of the motor and wires so you will have a guide in putting them back). Then you can pull out the motor at this point.

Then remove the two screws that holds the grip to the receiver.
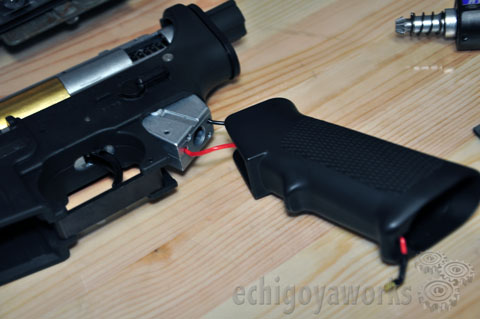
Then pull out the grip from the receiver.
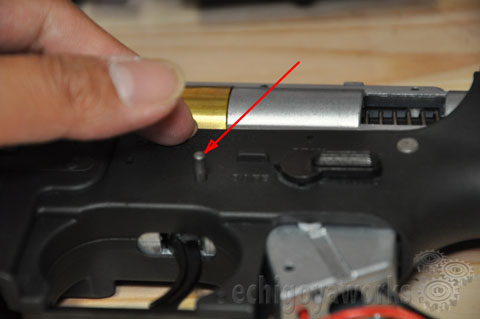
Remove this pin.

And use a screwdriver to remove the magazine catch latch.

And you are done, you have totally disasembled an M4 AEG.
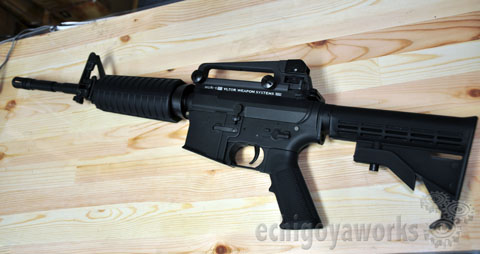
It is just a matter of retracing back the steps to reassemble the whole gun.
BLOG ARCHIVES

Following is photographic step-by-step disassembly of a standard M4 AEG. This is not the new recoil shock series.
This is a Tokyo Marui M4A1 rifle with upgraded metal body, so the beginning of disassembly is different from the stock plastic receiver.
First remove the lower handguard by pulling the delta ring backwards and pulling the lower handguard downwards.
Then turn over (no need to remove) the fuse assembly and disconnect the two wires connecting to the fusebox.
Now remove these two pins that holds the receivers in place. You can use an allen wrench and a small hammer if it's a little tight.
After removing the pins, start sliding the upper receiver forward, but not all the way.
This charging latch will catch on the gearbox as shown. So you need to pull the charging handle and slightly push it upwards to disengage it from the gearbox. Then you can slide the upper receiver all the way out.
Now that we have the upper receiver out, it is time to remove the gearbox. Please do not lose the bolt catch paddle, although the gun will work without it, it still adds a little realism to your gun.
Now remove the butt stock by pulling the stock lever as shown and then slide it outwards.
Now remove this screw (using allen wrench) which holds the buffer tube endcap.
Then using a phillips screwdriver remove the long screw that holds the buffer tube into the lower receiver.
And pull it out as shown.
Now to remove the motor, remove these two screws under the grip.
Once the screws are removed the grip cover will come out. Be careful not to lose the round metal plate. This is needed for the motor tension adjustment for proper meshing of gears.
Then disconnect the two wires from the motor (take note of the position of the motor and wires so you will have a guide in putting them back). Then you can pull out the motor at this point.
Then remove the two screws that holds the grip to the receiver.
Then pull out the grip from the receiver.
Remove this pin.
And use a screwdriver to remove the magazine catch latch.
And you are done, you have totally disasembled an M4 AEG.
It is just a matter of retracing back the steps to reassemble the whole gun.
BLOG ARCHIVES

Dura Coat Finishes
P90 Disassembly
MP5K Disassembly
H&K UMP Gearbox ver. 3
Gearbox Reassembly
TM Scar Gearbox Disassembly
P90 Disassembly
MP5K Disassembly
H&K UMP Gearbox ver. 3
Gearbox Reassembly
TM Scar Gearbox Disassembly
Posted by echigoyaworks
at 12:10
│DIYs


